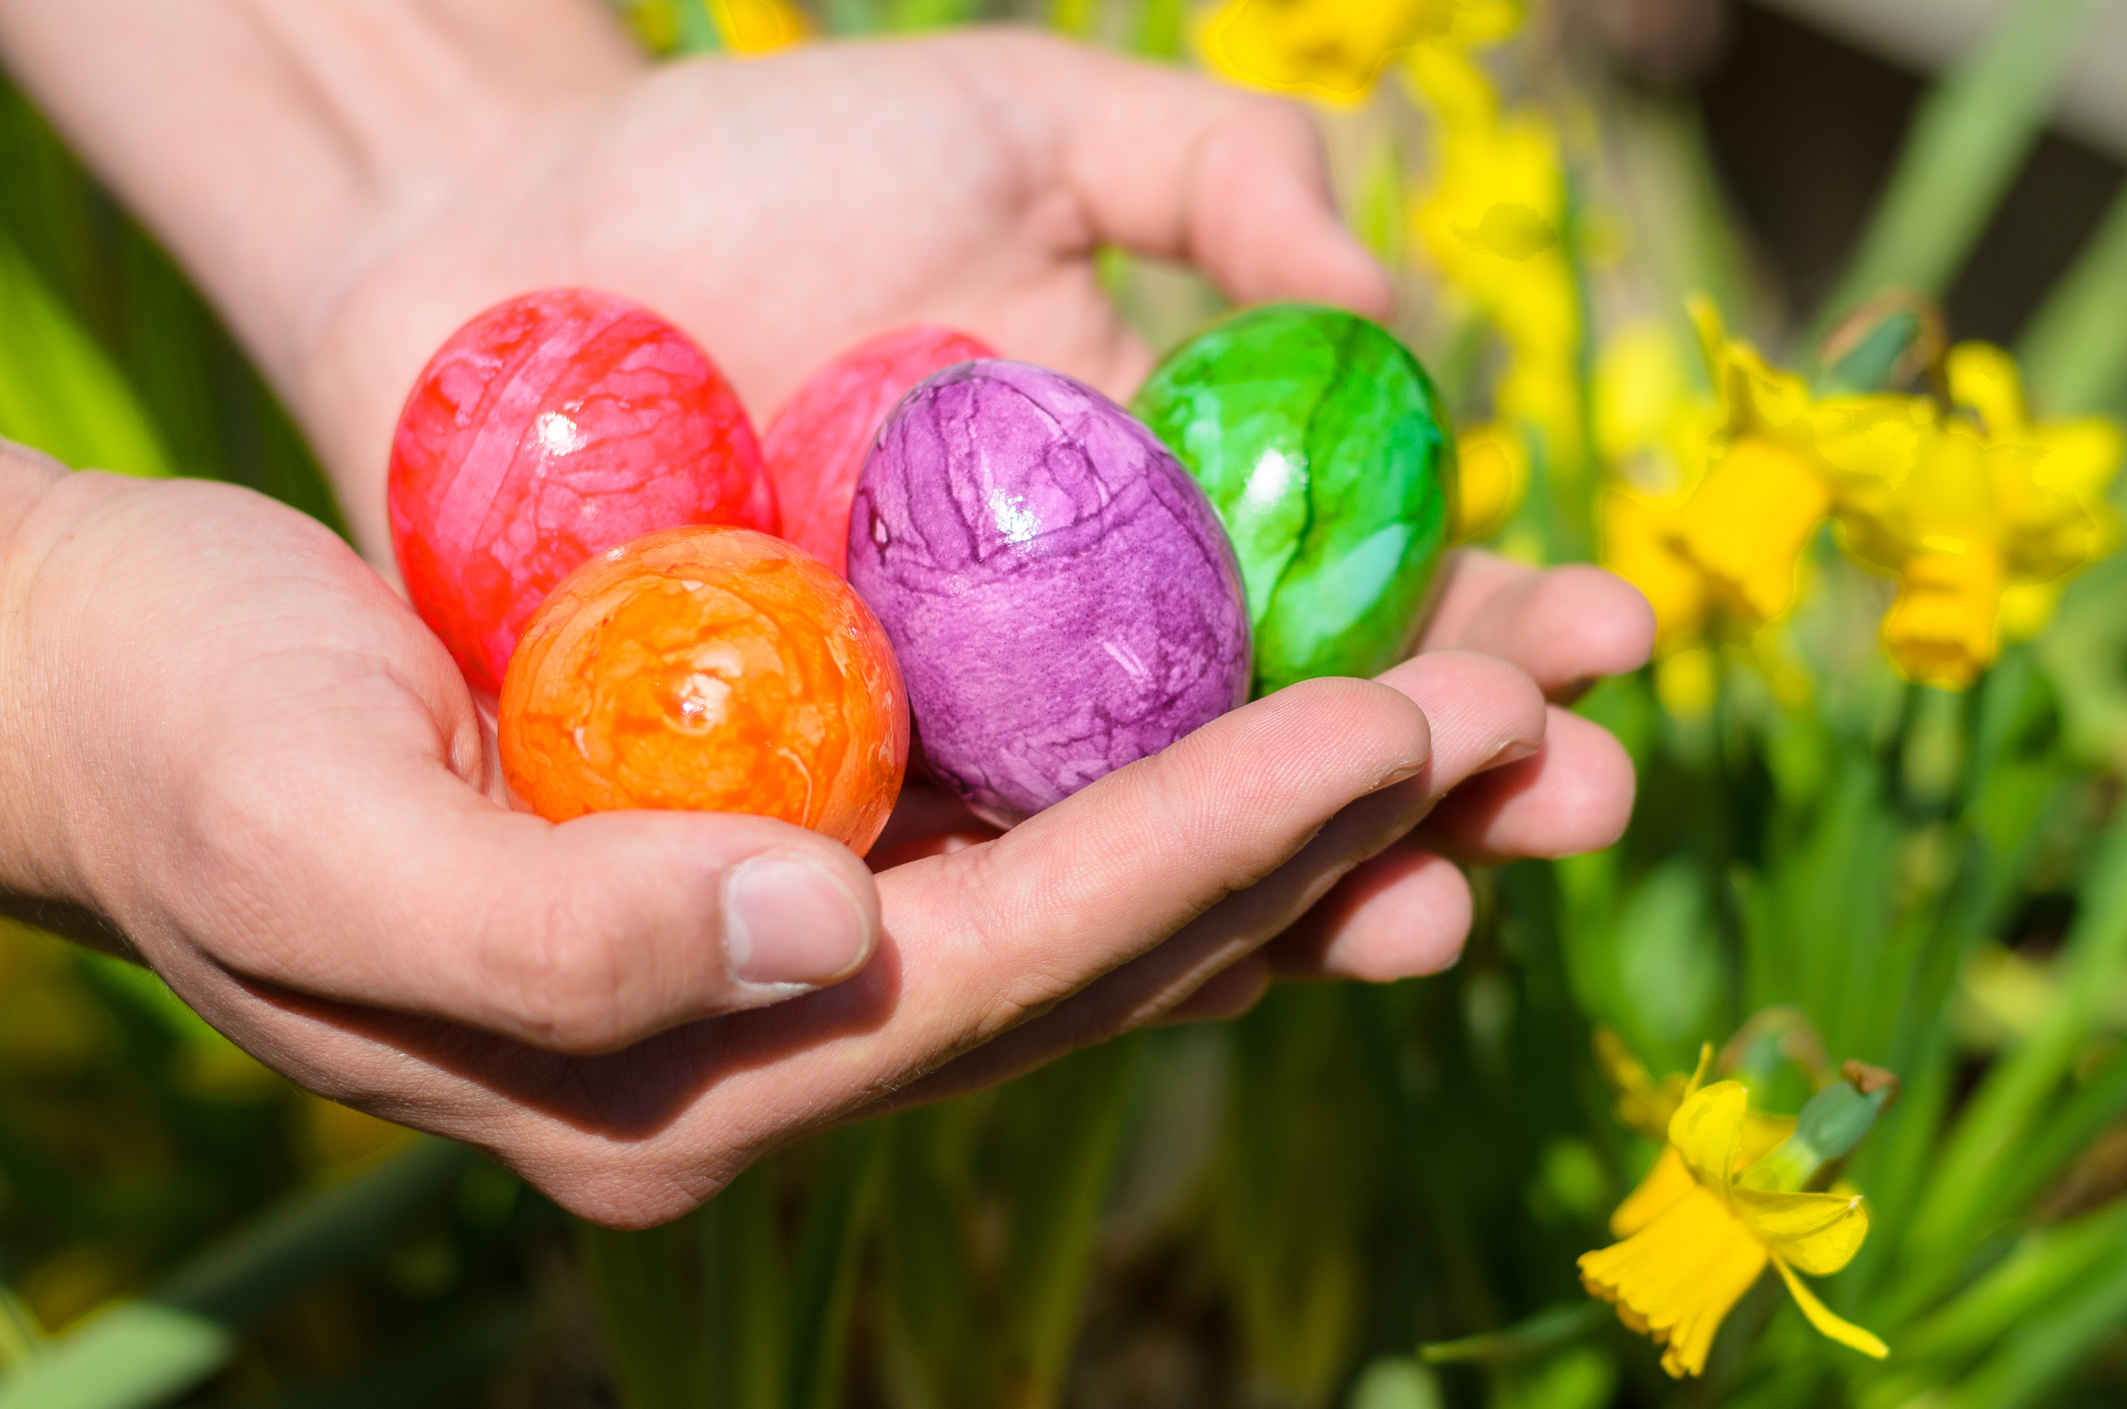
Decorating eggs is a fun and traditional springtime activity, and surprise! It actually didn’t start with the celebration of Easter. Archaeologists discovered decorated ostrich eggs in Africa that date back over 60,000 years. Now you and your loved ones can continue that tradition with some dye and a carton of eggs from the store… which is wayyyy easier than following an ostrich around. 😊
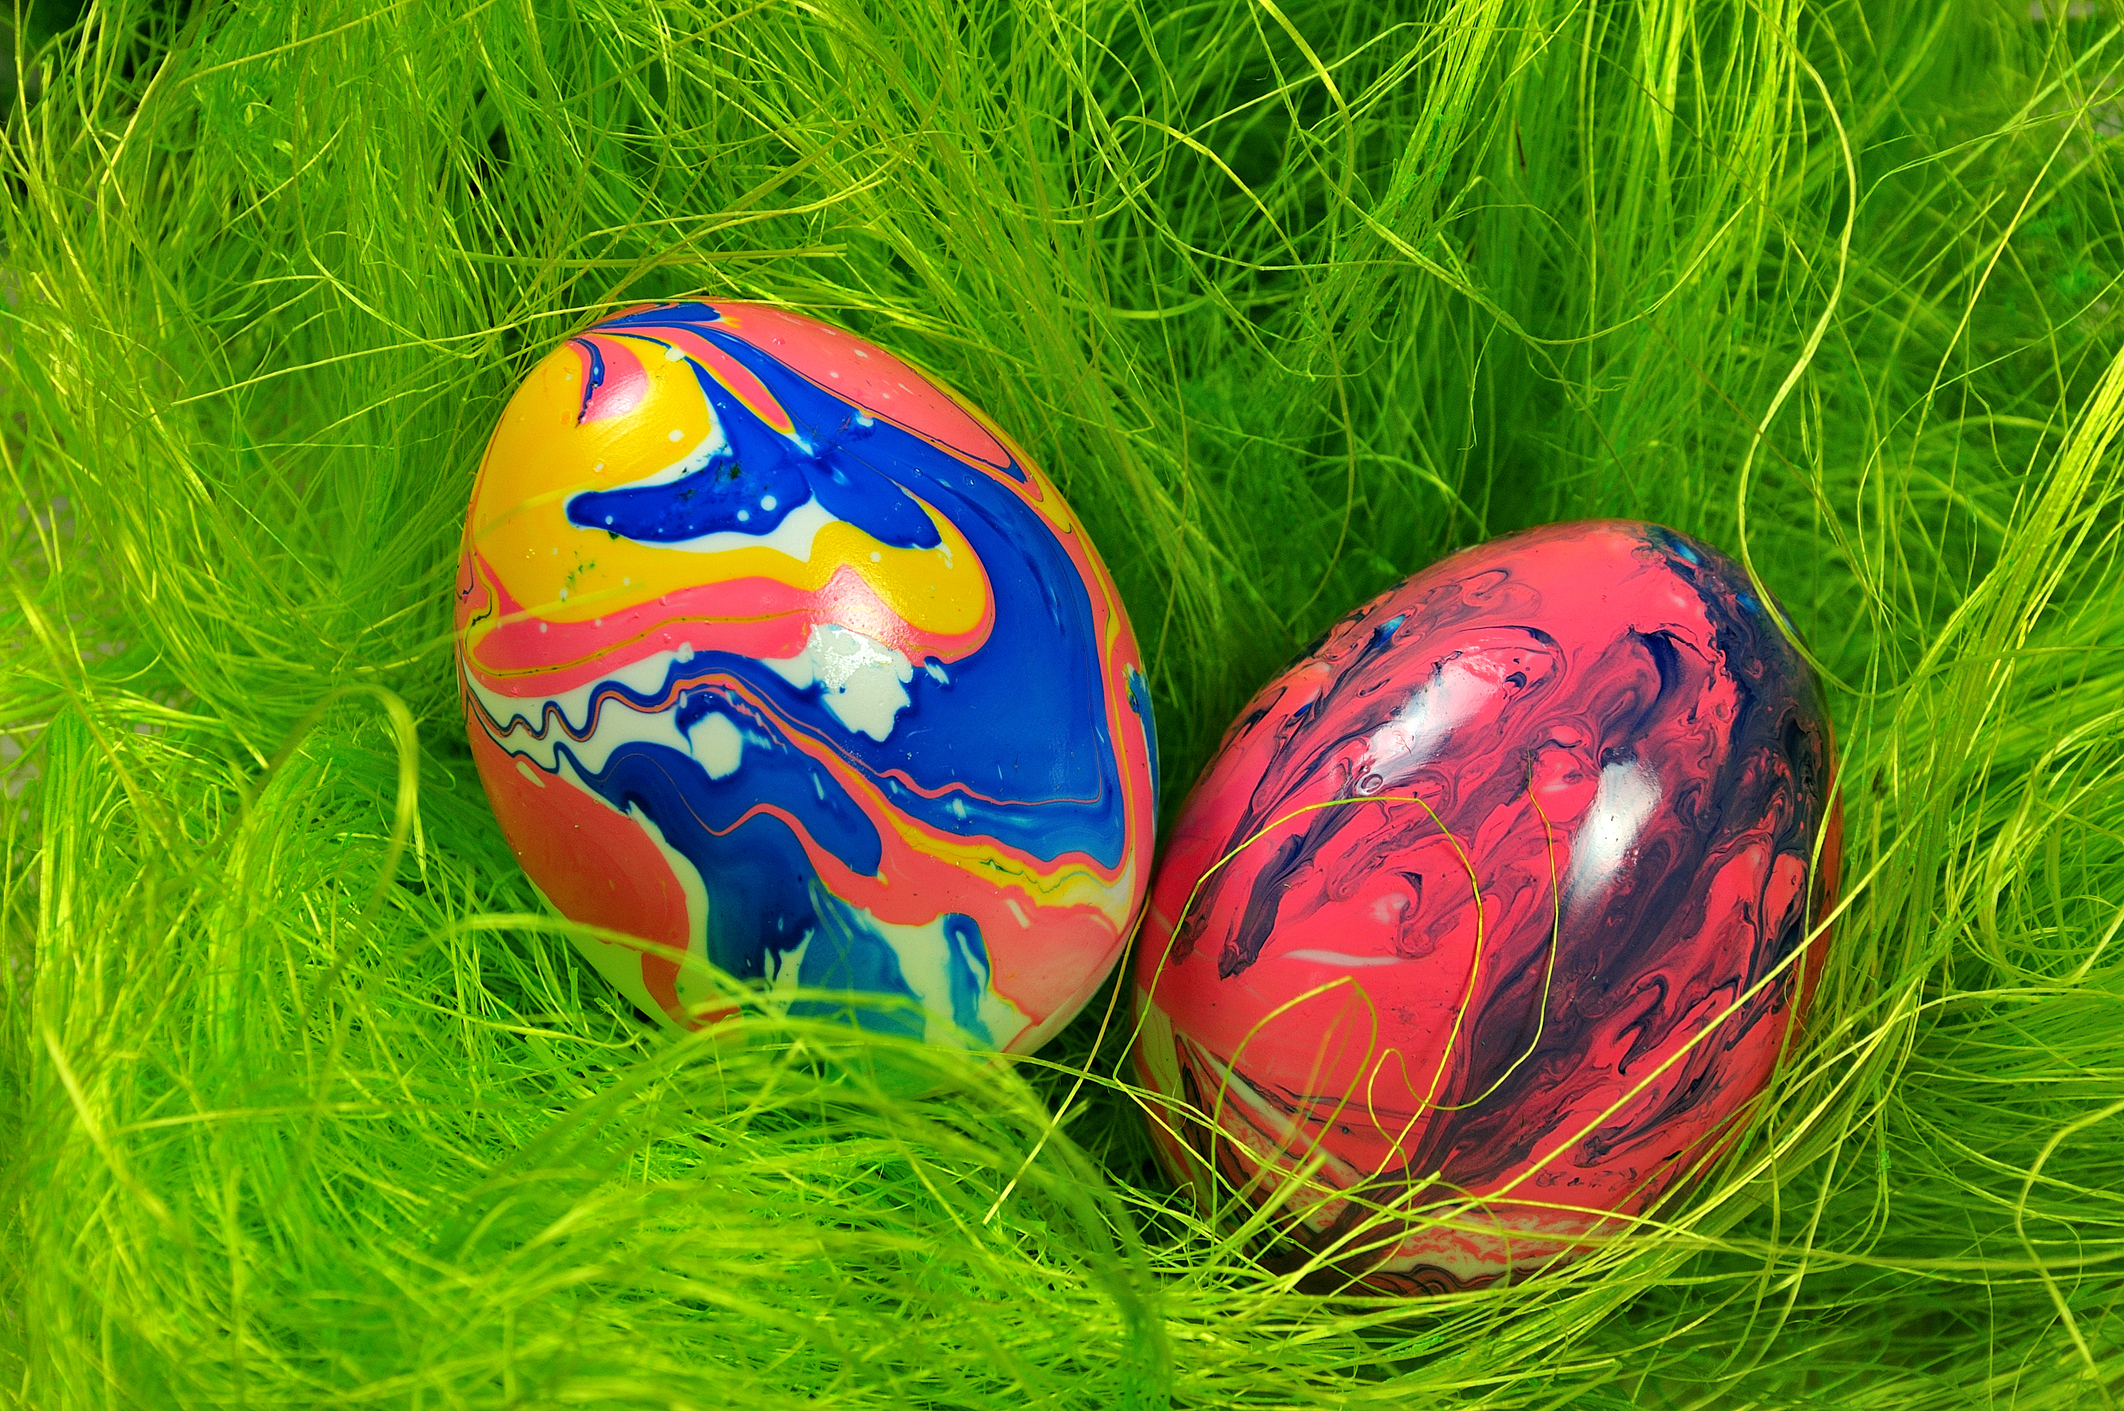
If you’re looking for a different way to decorate your Easter eggs this year, try creating a marbled look with nail polish or other convenient household items. It’s the perfect way to get rid of the old nail polish you don’t use anymore and have a great time with the kids! To start off, you’ll just need to hard boil some eggs. Not sure how to boil the perfect egg? You’re not alone. We used this easy recipe to get started!
What You’ll Need
You’ll only need a few basic household supplies to get started:
– Room temp hard boiled eggs
– Nail polish in lots of different colors
– Bowl filled with water
– Toothpicks
– Paper towels
– Egg dipper (optional)
Step One
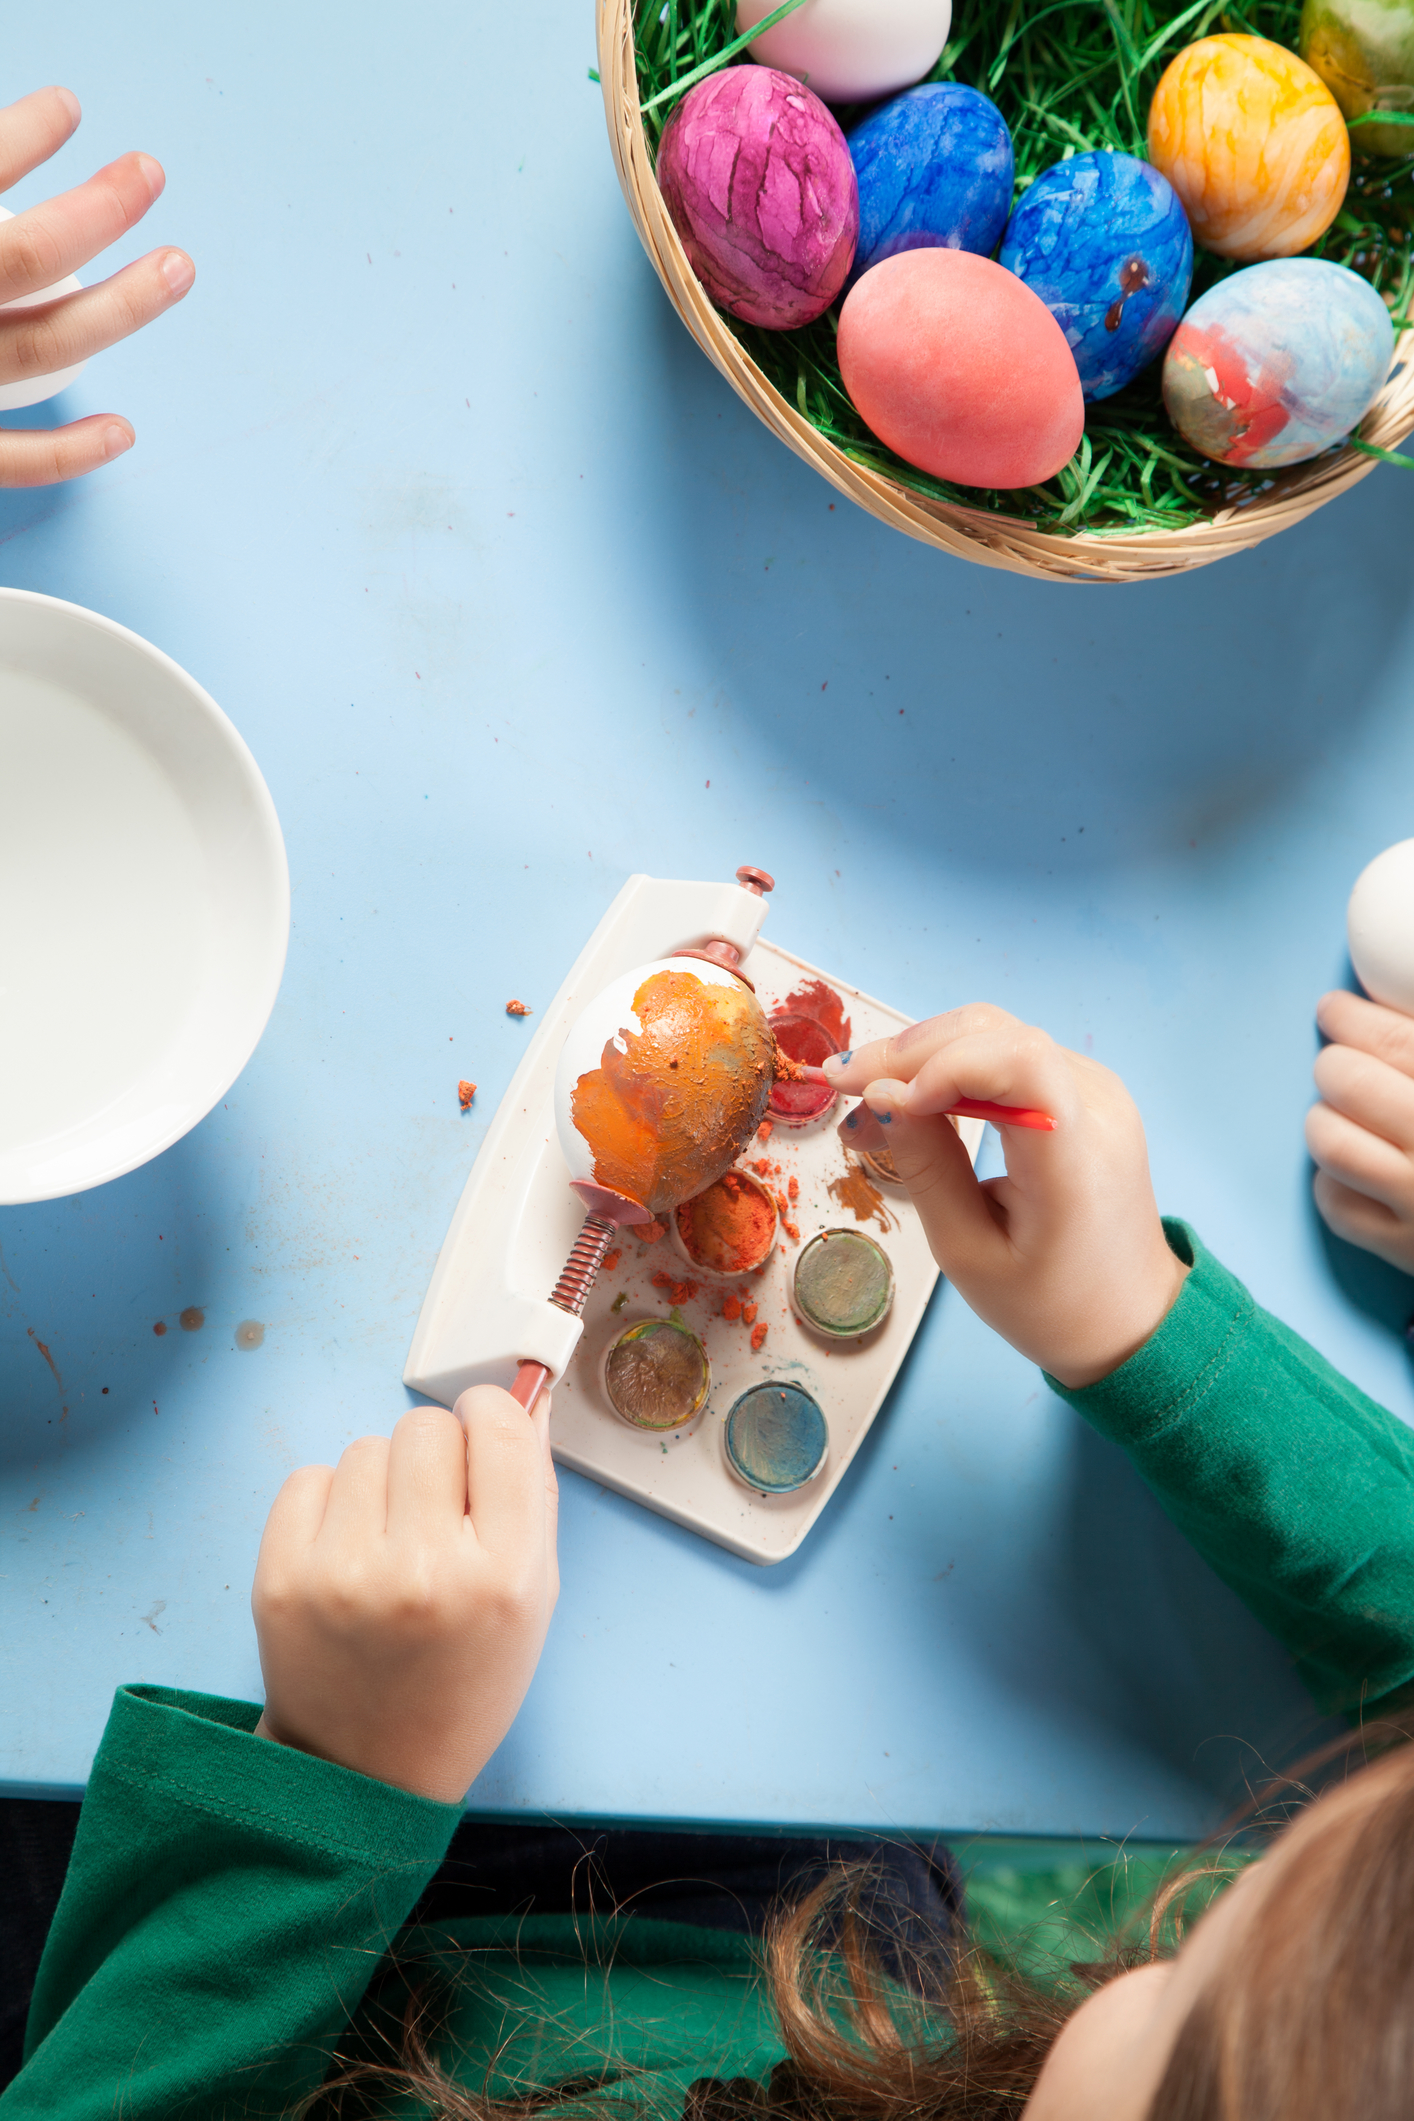
First, you’ll want to choose your first color of nail polish and put a couple of drops on to the surface of the water. Be sure you work quickly and drop the nail polish from only an inch away from the water top!
Step Two
Quickly add the second color to the water. Then use a toothpick to swirl the colors together on the surface. Continue adding as many colors as you like, but three is usually just right! When you’re done, the surface of the water should look marbled.
Step Three
For this step, you can either use your fingers or an egg dipper. You’ll need to gently lower the egg to the surface of the water so that the nail polish adheres to the egg. Then, roll the egg around so the nail polish covers the whole egg.
Step Four
Once you’re finished, carefully set your egg in the egg carton or on a paper towel to dry.
Step Five
Now do it again for the next egg! If you want, you can try different colors each time to add some color variety to your marbled eggs!
Step Six
This one’s up to you! There are tons of options for your eggs. Whether you throw an egg hunt for the kids or display the eggs in a bowl, this new marbled look will add some fun to your spring décor.