If you’ve ever been stuck at home with your kids on a snow day, you know those little fingers and toes can get cold pretty quickly. If you have to bring the little ones inside, having a few indoor activities can be a real lifesaver. Crafts are a great go-to, and if you’re looking for a craft that’s winter-themed, these paper cup penguins are super fun to make! You’ll just need some basic household items and a few crafting supplies to get started.
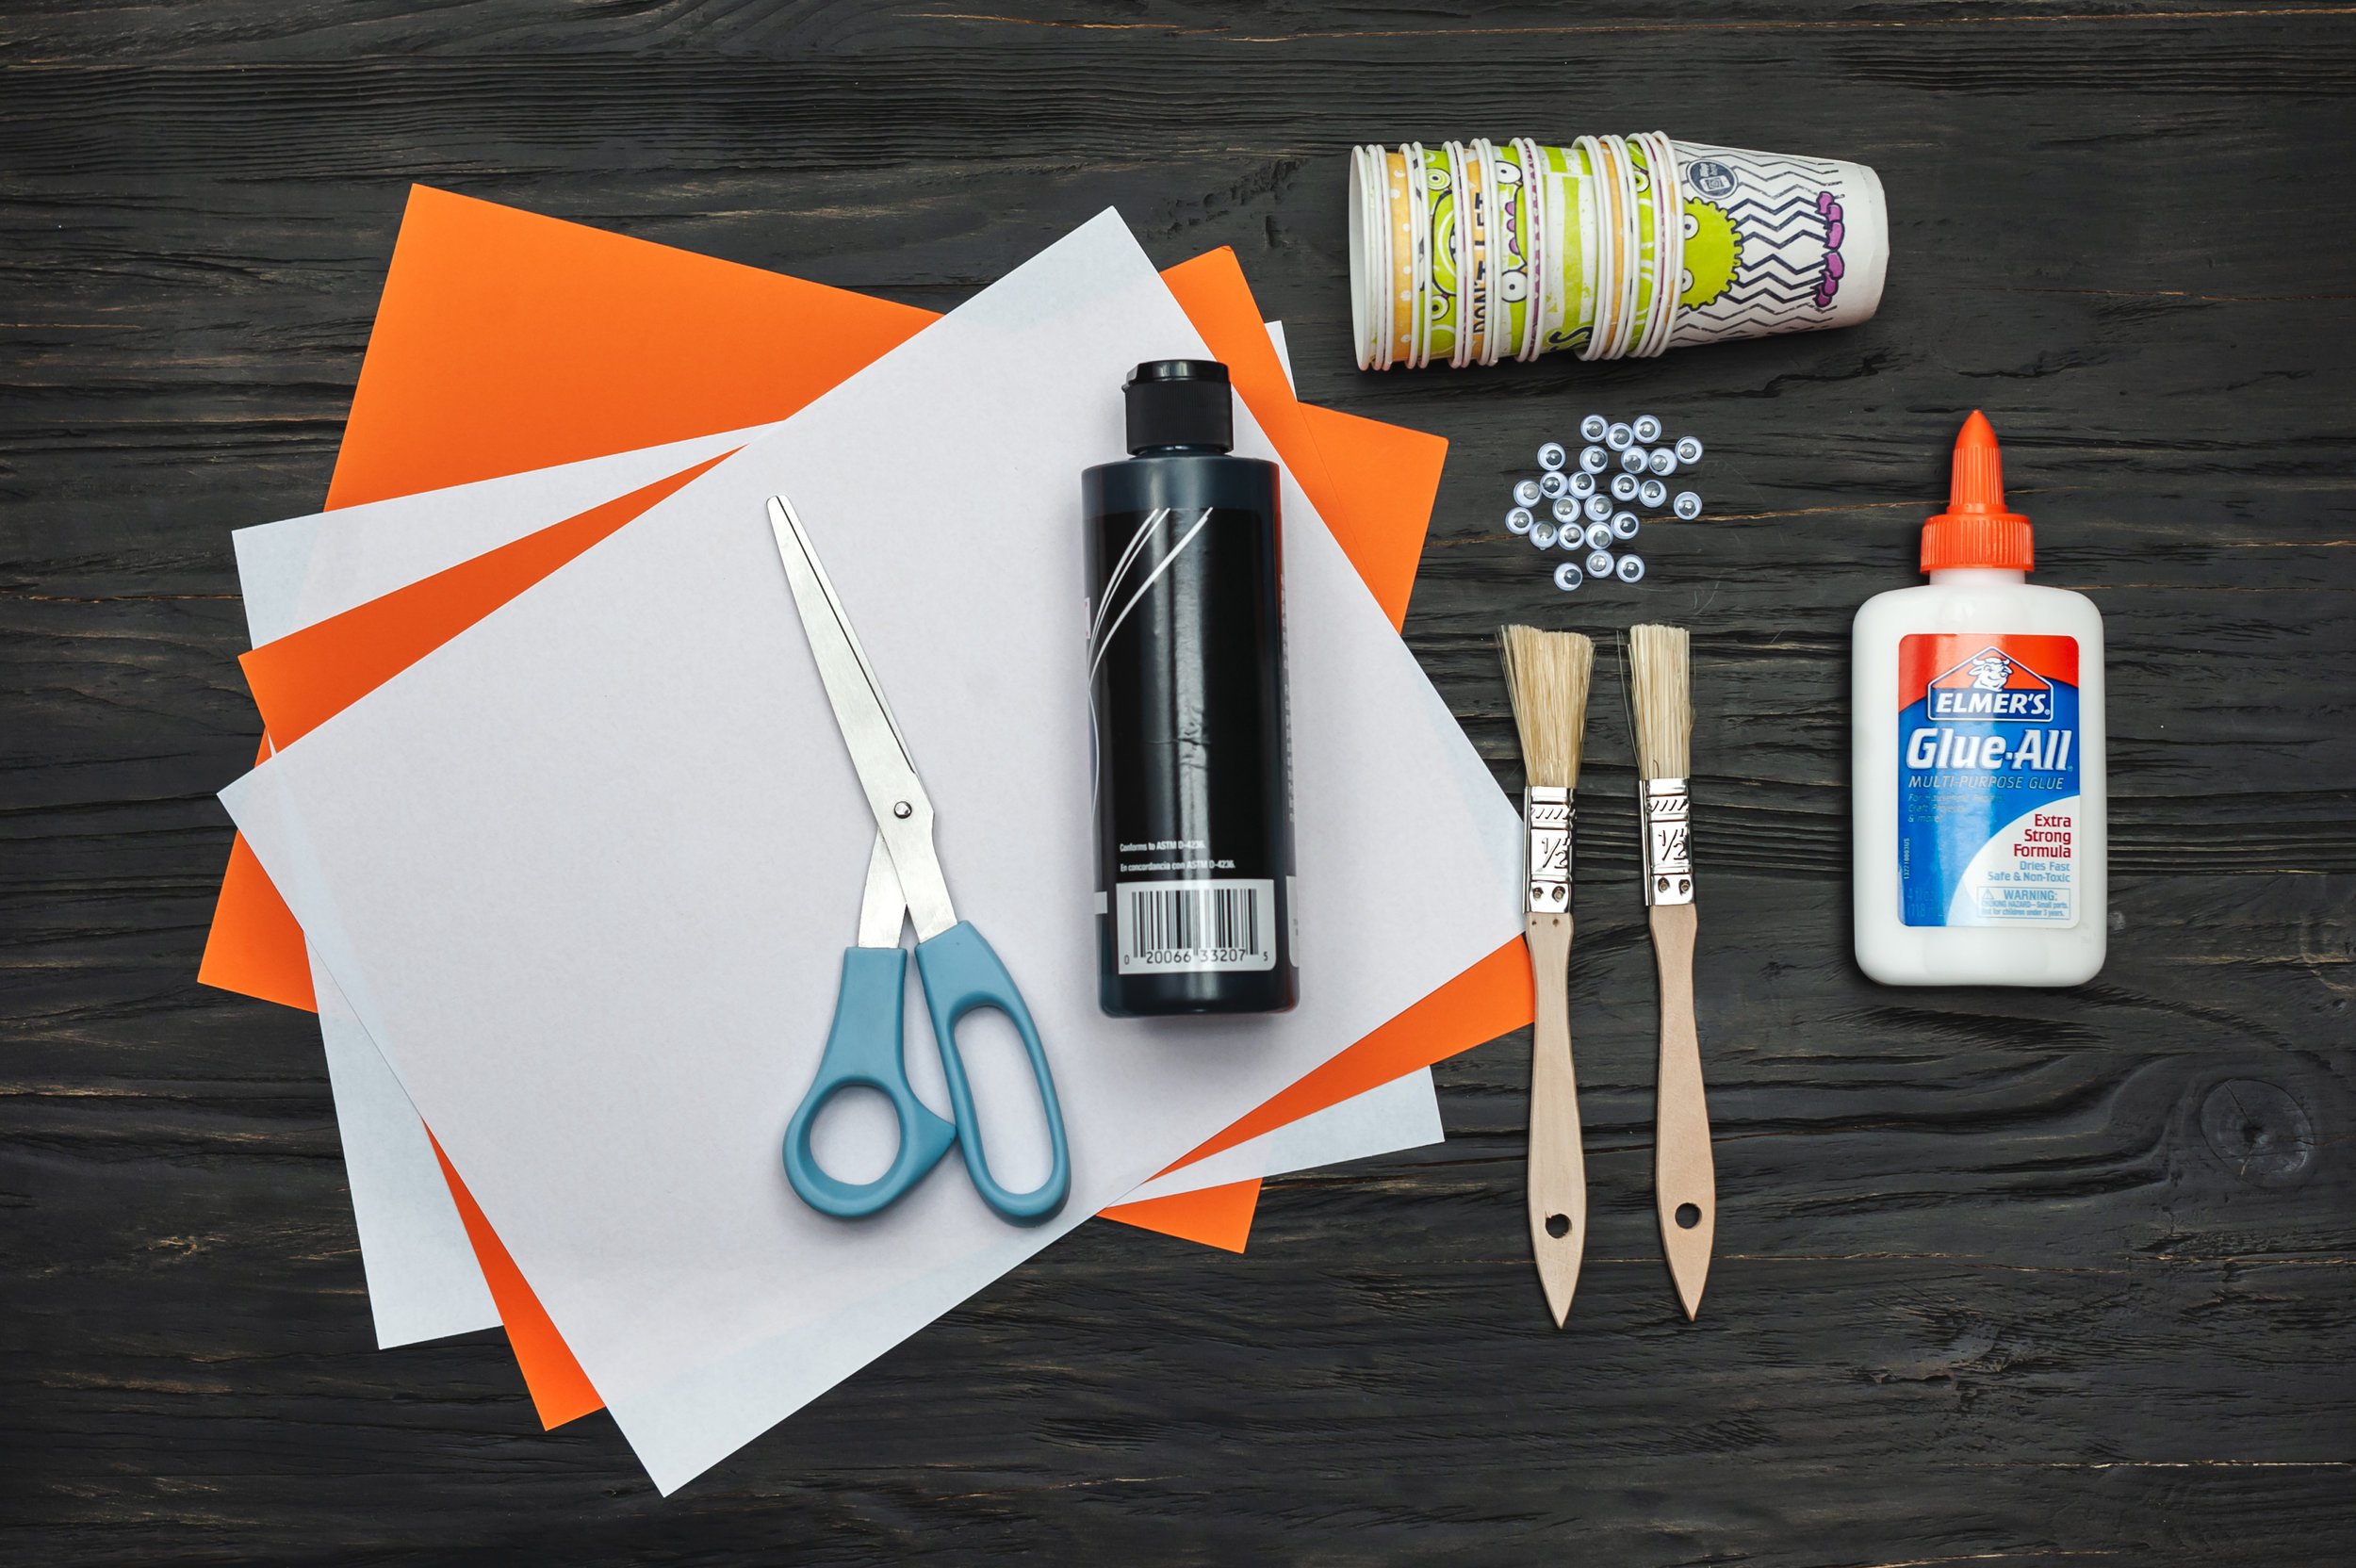
Here are the supplies you’ll need:
-
Paper cups
-
Black acrylic paint
-
White and orange construction paper
-
Googly eyes
-
Craft scissors
-
Small paintbrush
-
Craft glue
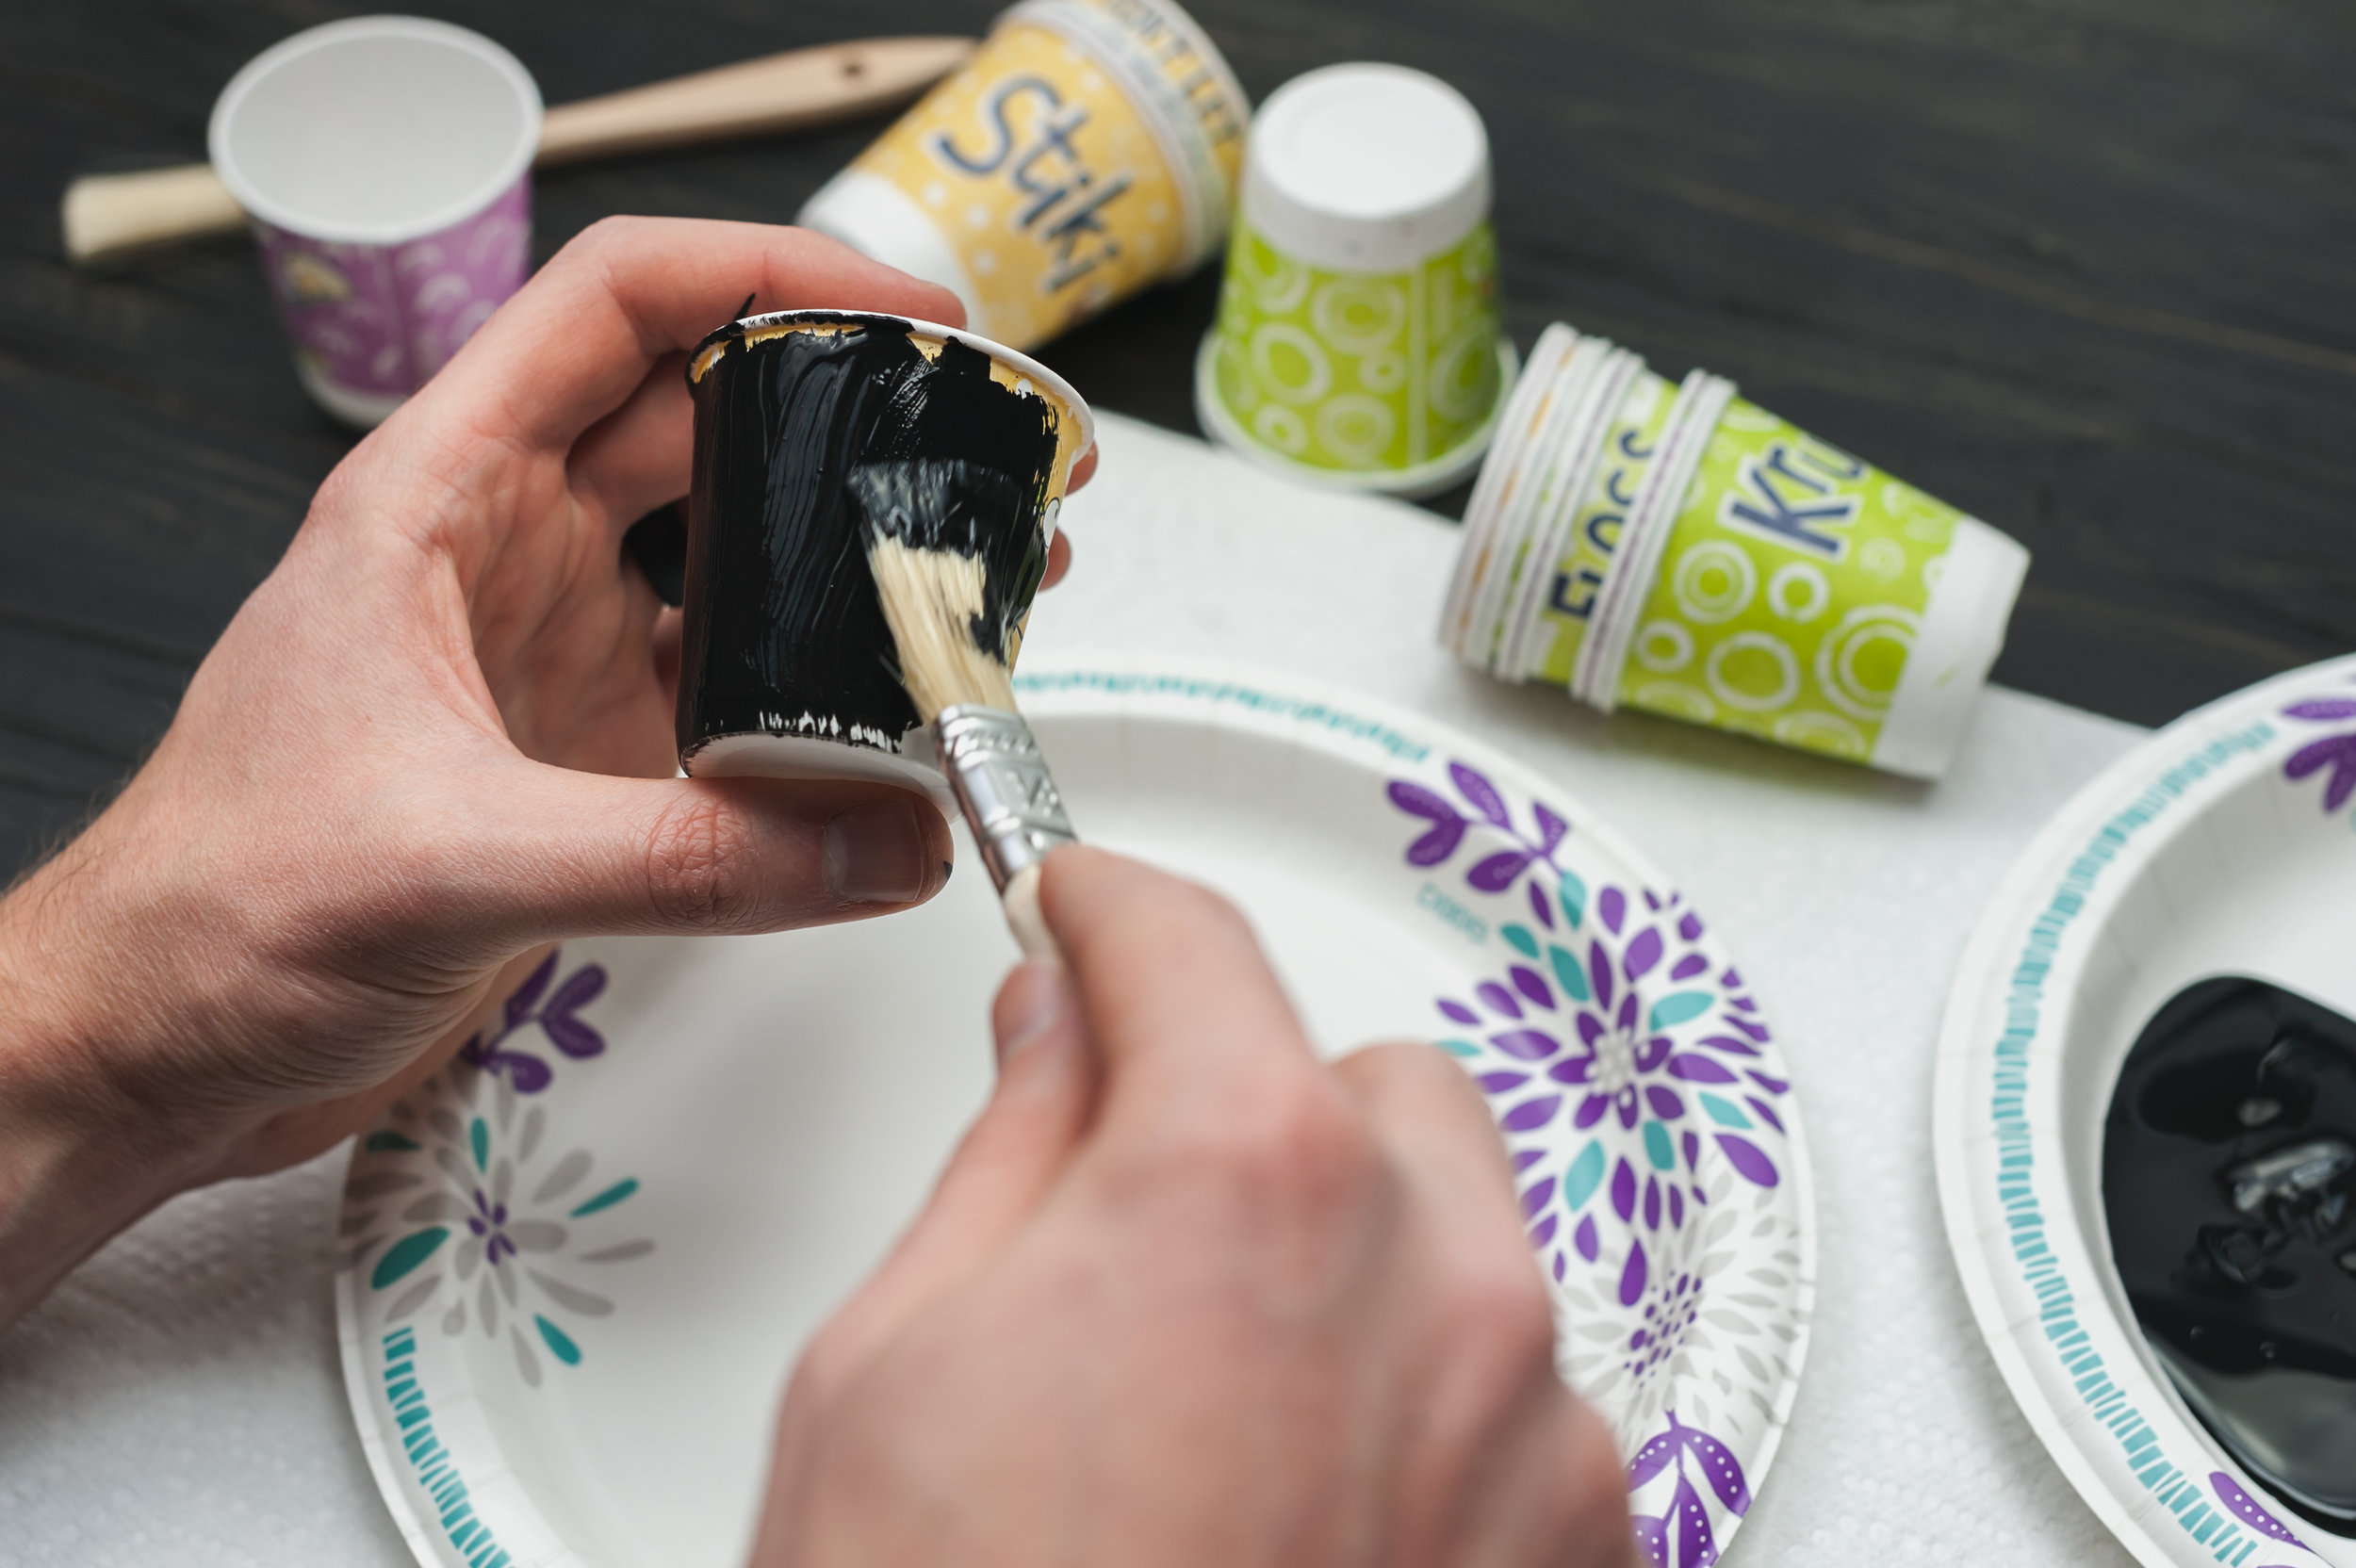
1. Paint your penguins.
To make the penguins’ bodies, start by painting the paper cups! This part can get messy, so be sure to lay out some newspaper, paper plates, or garbage bags to protect your tables. You can either use black acrylic paint for a classic penguin look, or a fun color if you’re feeling crazy.
It’ll take awhile for the paint to dry, so it’s the perfect time to put on a movie with your kids while you cut out the beaks, feet, and bellies for the penguins. (Frozen for the 1,000th time, anybody?)
2. Cut your construction paper.
You’ll need to cut out shapes from your white and orange construction paper to form your penguin’s beak, feet, and belly. Older kids can do this themselves, but you obviously need to help your little ones. See how each shape should look in the image below.
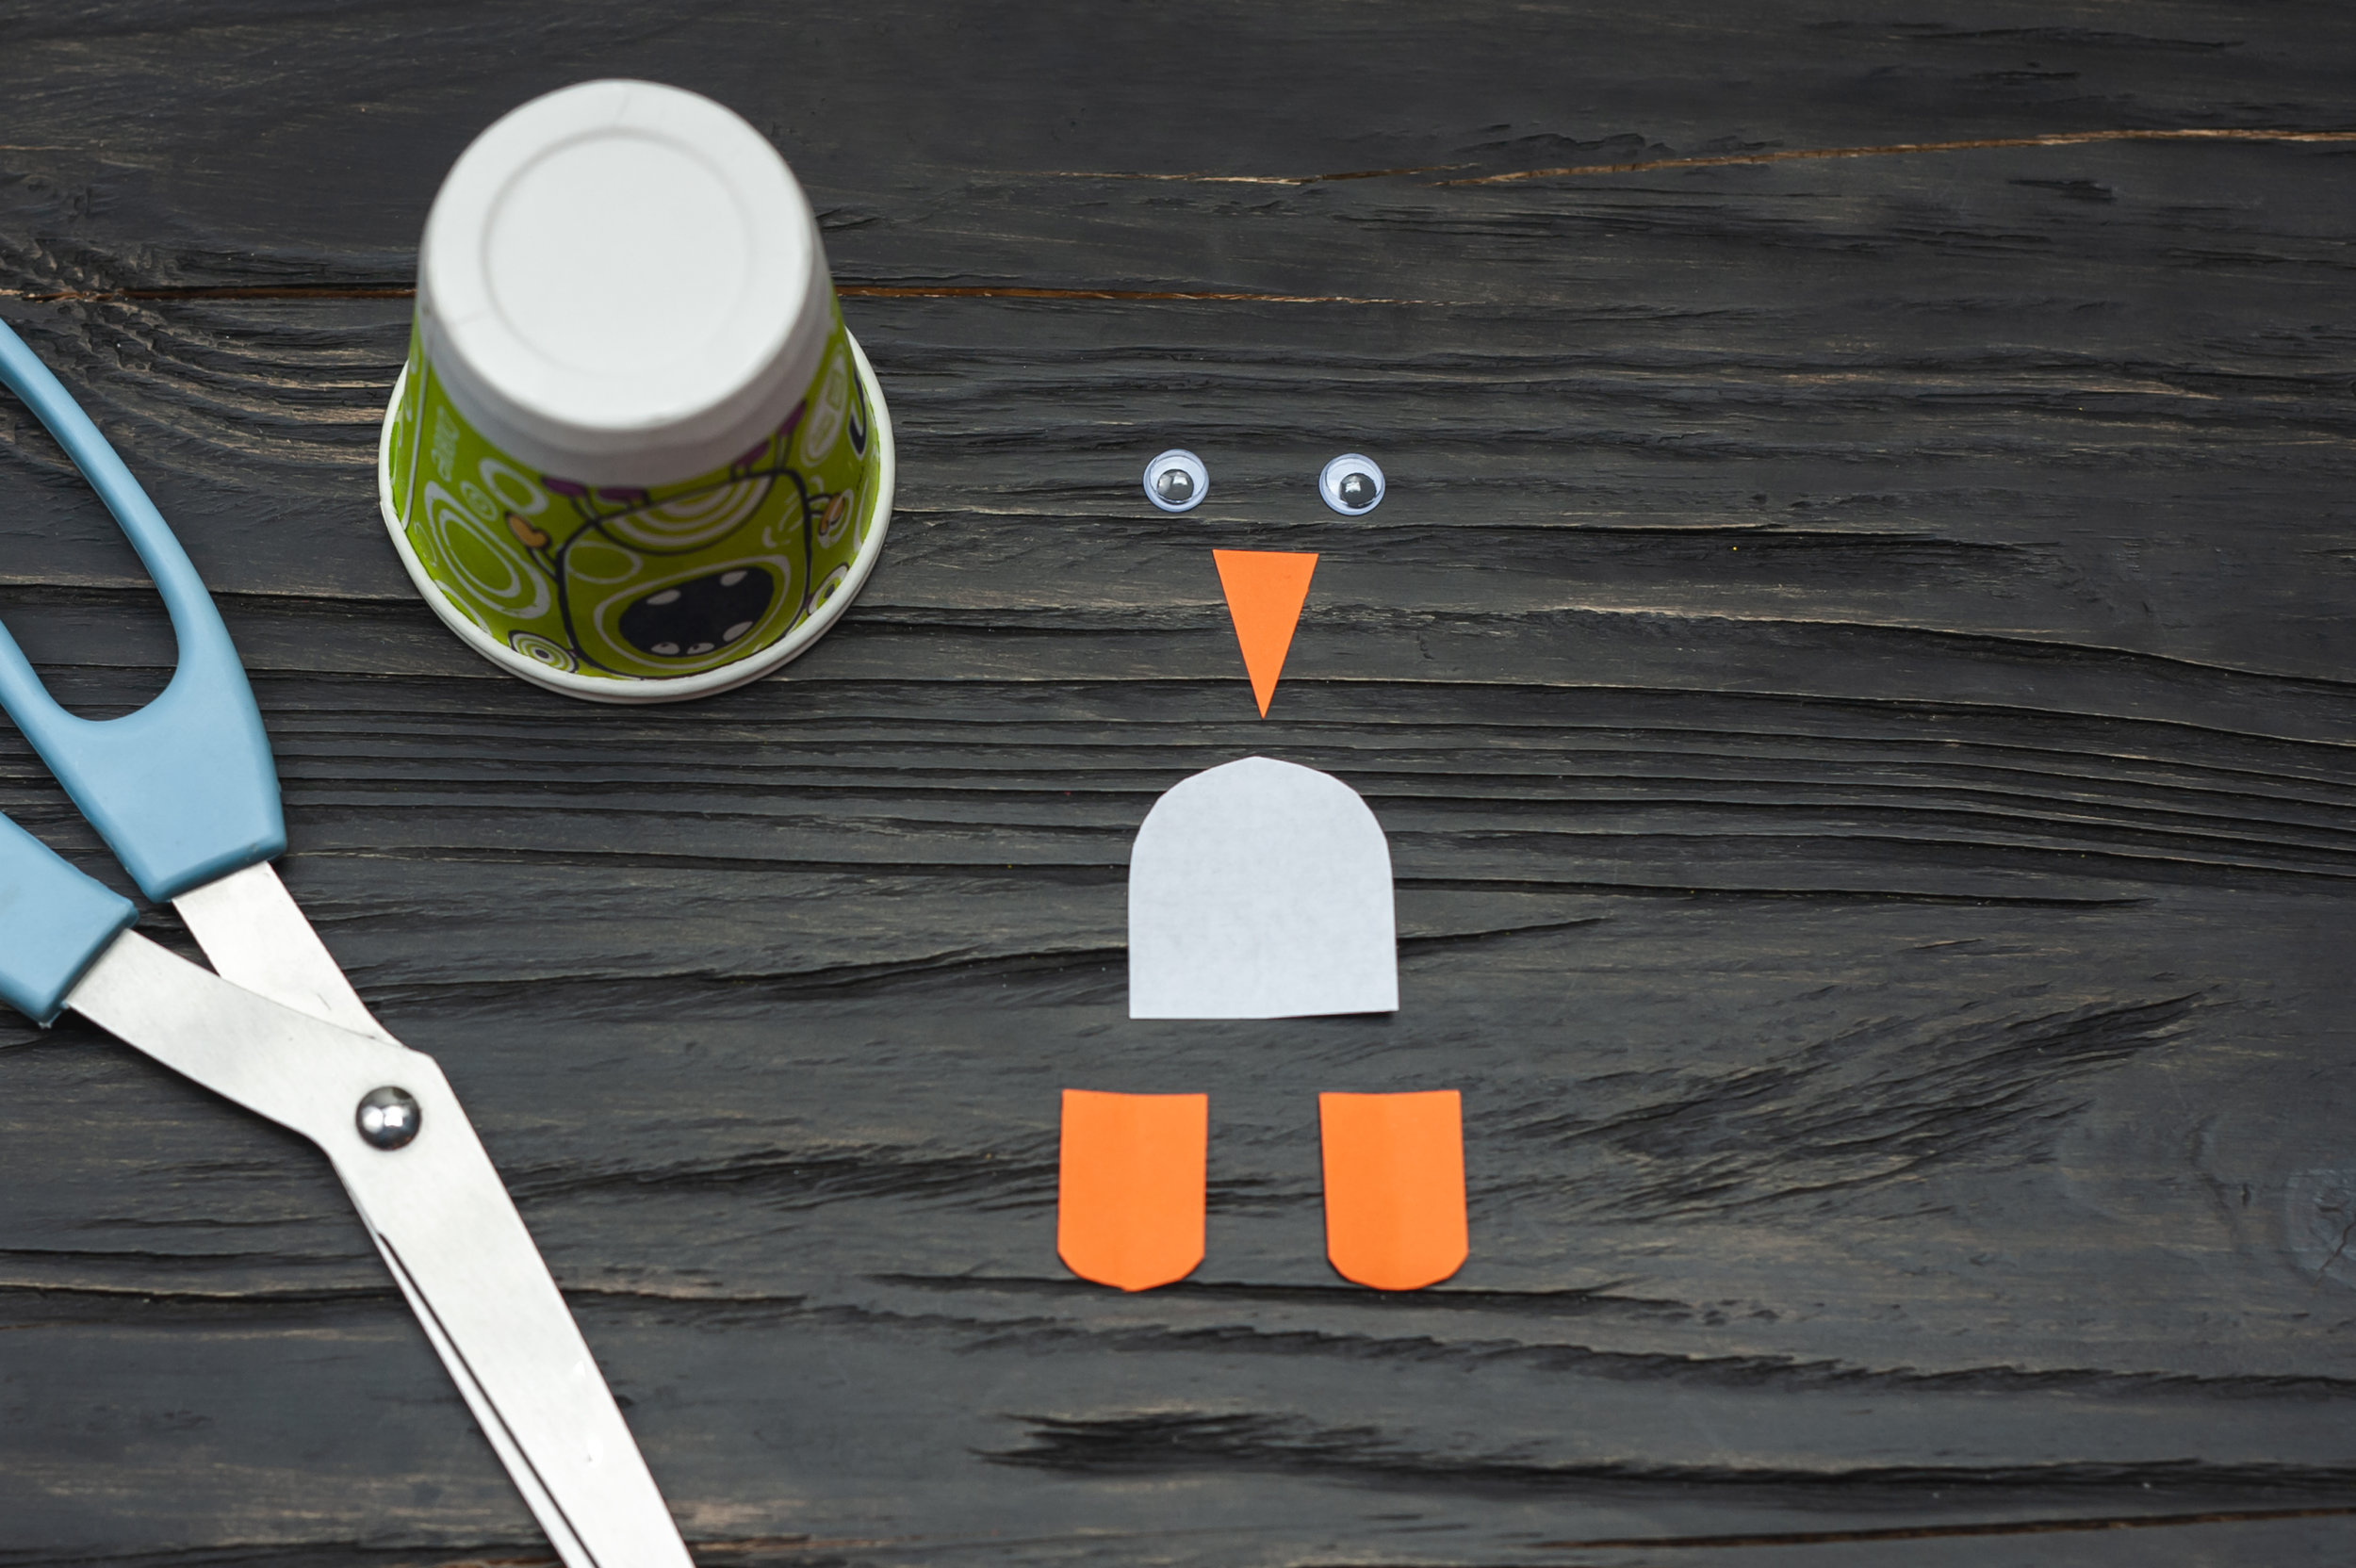
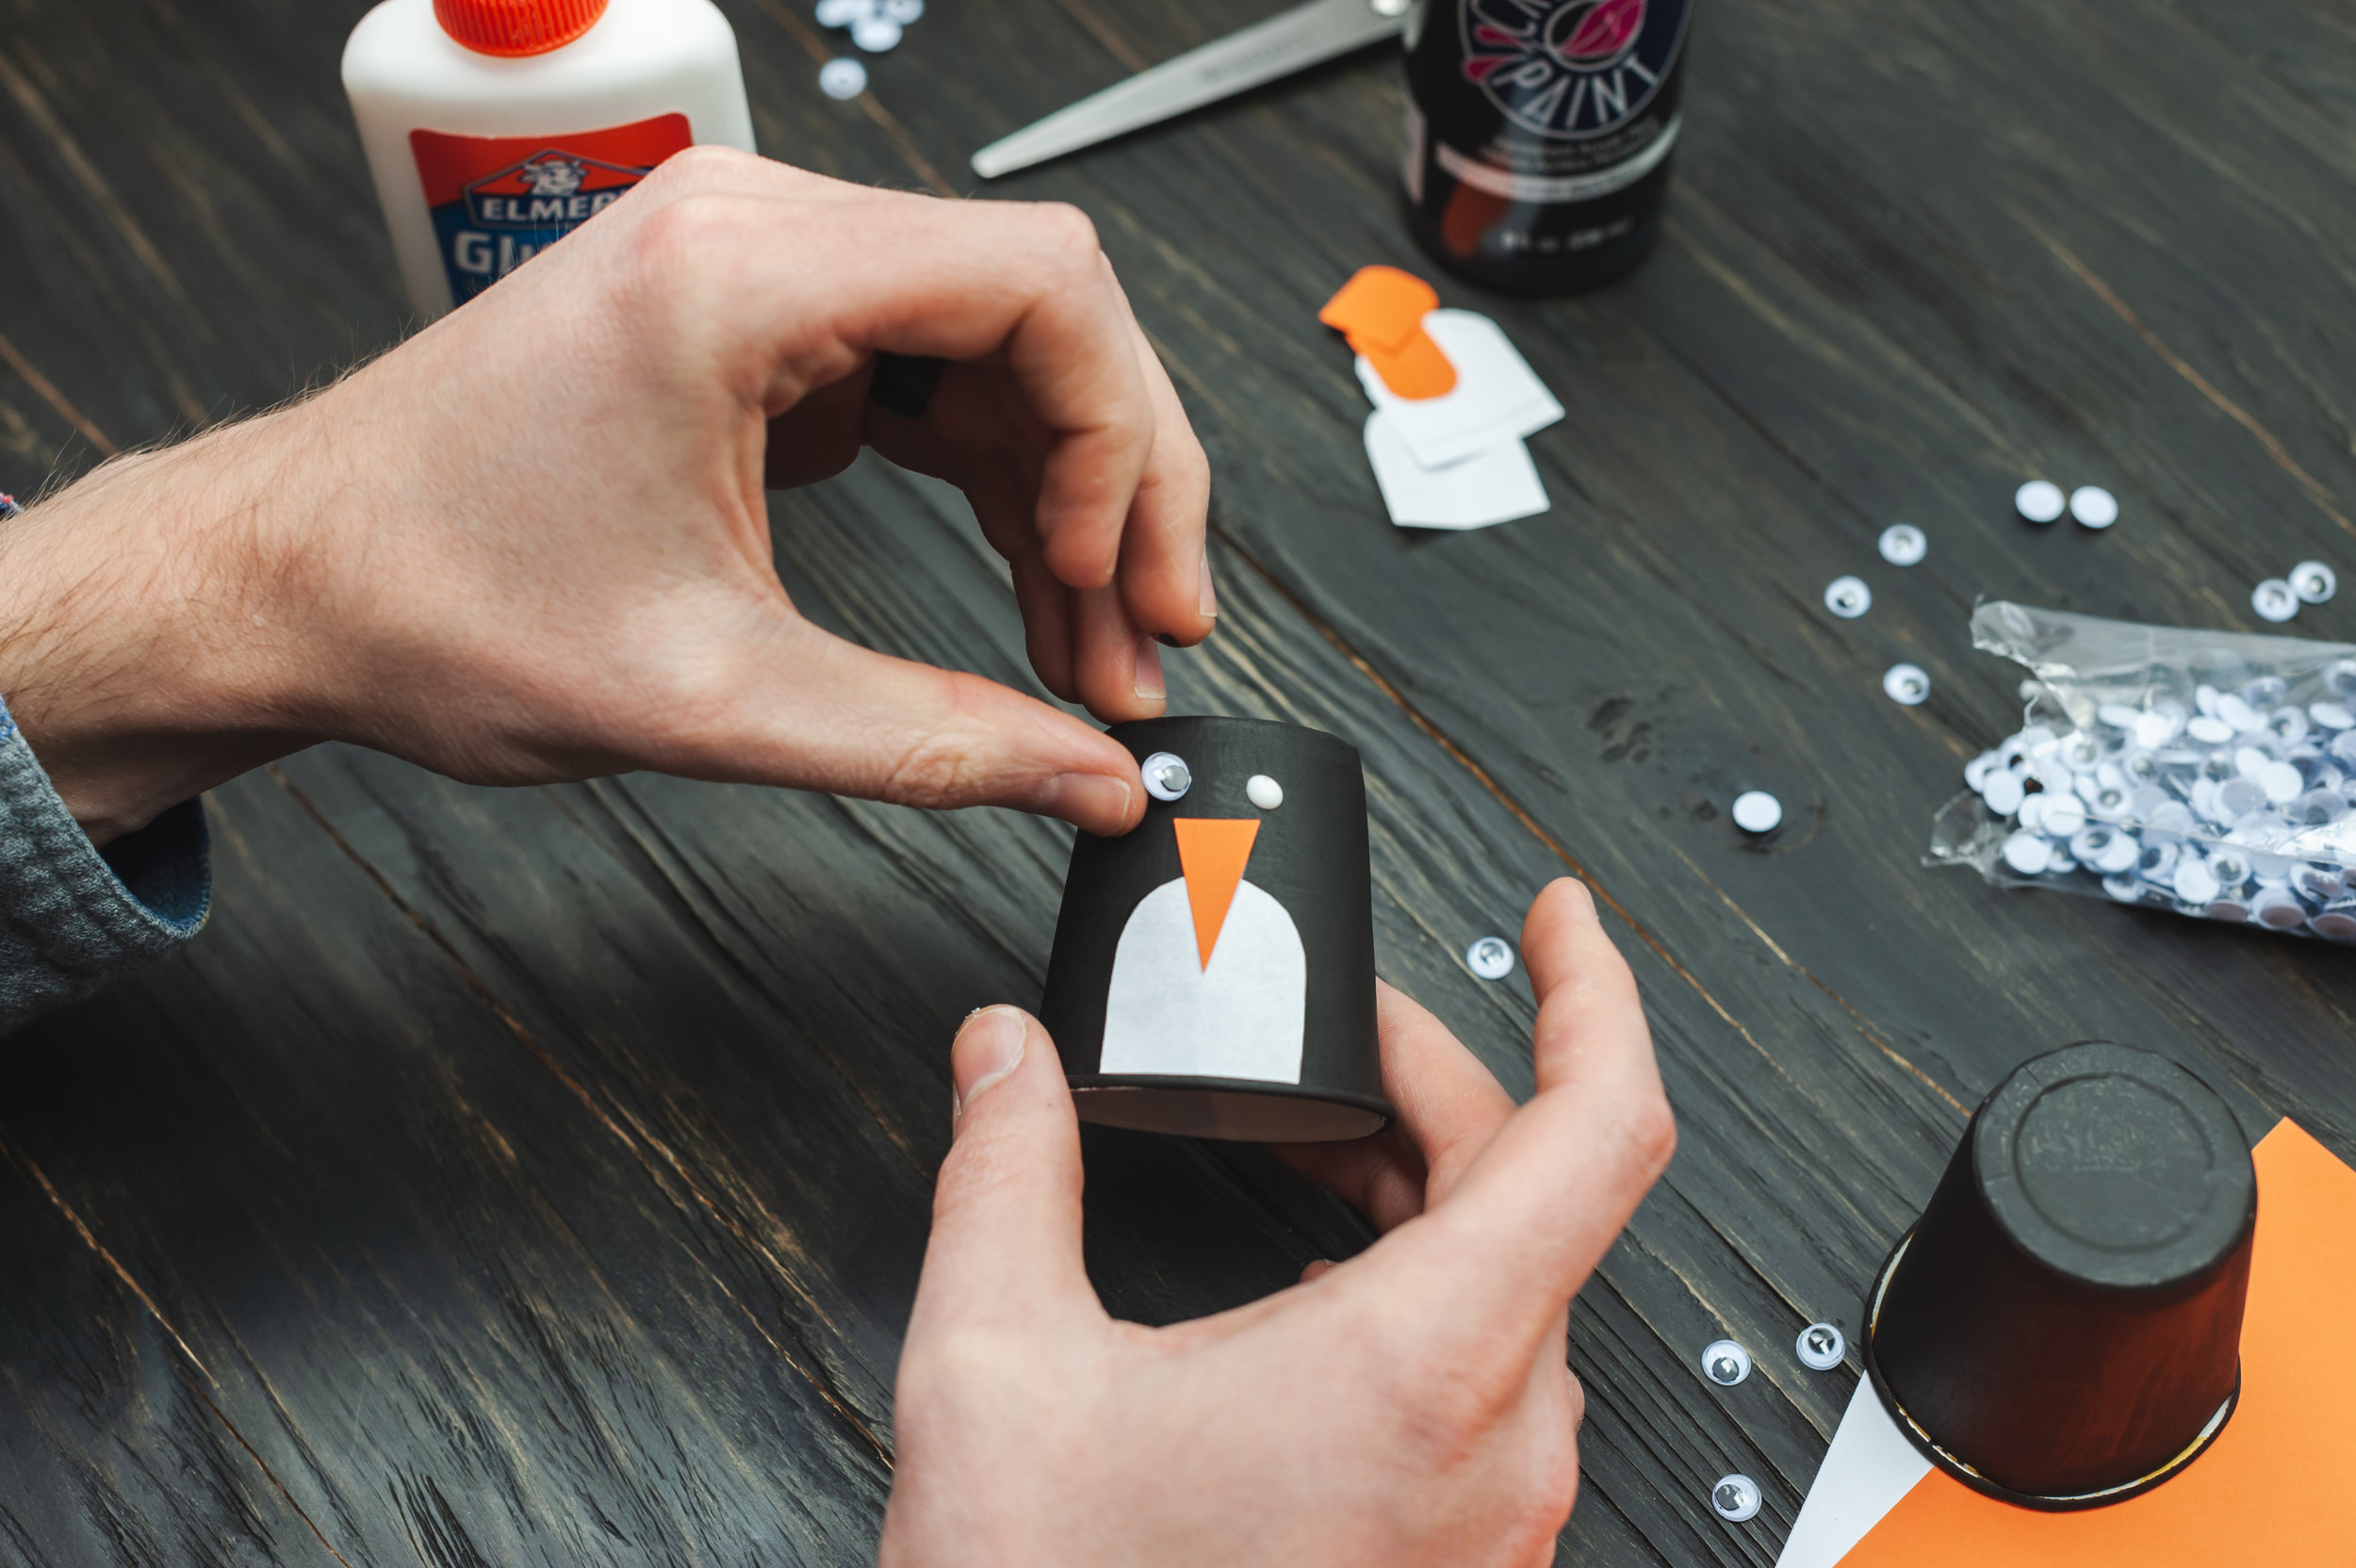
3. Glue on the beak, belly, feet, and eyes!
Glue the white “belly paper” to the front of the paper cup. Next, attach the beak at the very top of the belly. Glue on the googly eyes, then fold the foot papers and glue the top part to the inside of the cup. All done!
Create an entire penguin family and add glitter, paint pen designs or even construction paper bow ties for extra swagger. Happy crafting!